If you’ve been thinking about starting a blog and are looking to see what it entails, you’ve come to the right place
In this post I’m going to show you how easy it is to set up a blog so you can focus on what matters – the content you will be sharing with you readers. Your blog can be up and running in less than an hour if you follow the steps below, one by one. The tech stuff is much easier than you think, it’s the writing that’s the hard part!
Here’s what you will learn throughout this post:
- Finding a hosting company
- Registering a domain name
- Installing WordPress
- Choosing a theme
- Familiarizing yourself with the WordPress dashboard
Why Start a Blog Today
Because the desire and excitement to start something new wanes quickly with time.
A long time ago a friend of mine told me that she had this theory that ideas floated all around us and once in a while, just like a butterfly, one landed on our shoulder. Whether we did something with it or not was up to us, the important thing was to do it quickly, before the idea flies away and finds another shoulder to rest on.
I believe that to be 100% true. We all have the potential to make our dreams come true, only we can stop ourselves from achieving our goals by being inactive or waiting too long.
I started a food blog called Pickled Plum almost a decade ago. After spending more time than I’d like to admit complaining about my job in retail, I decided one day to do something about it. I started looking around the internet for ways to work from home and after a few days, came upon a food blog that shared tips on how to make money online. I couldn’t believe it – here were two regular people sharing recipes from the comfort of their kitchen and revealing their monthly income – which was a lot!
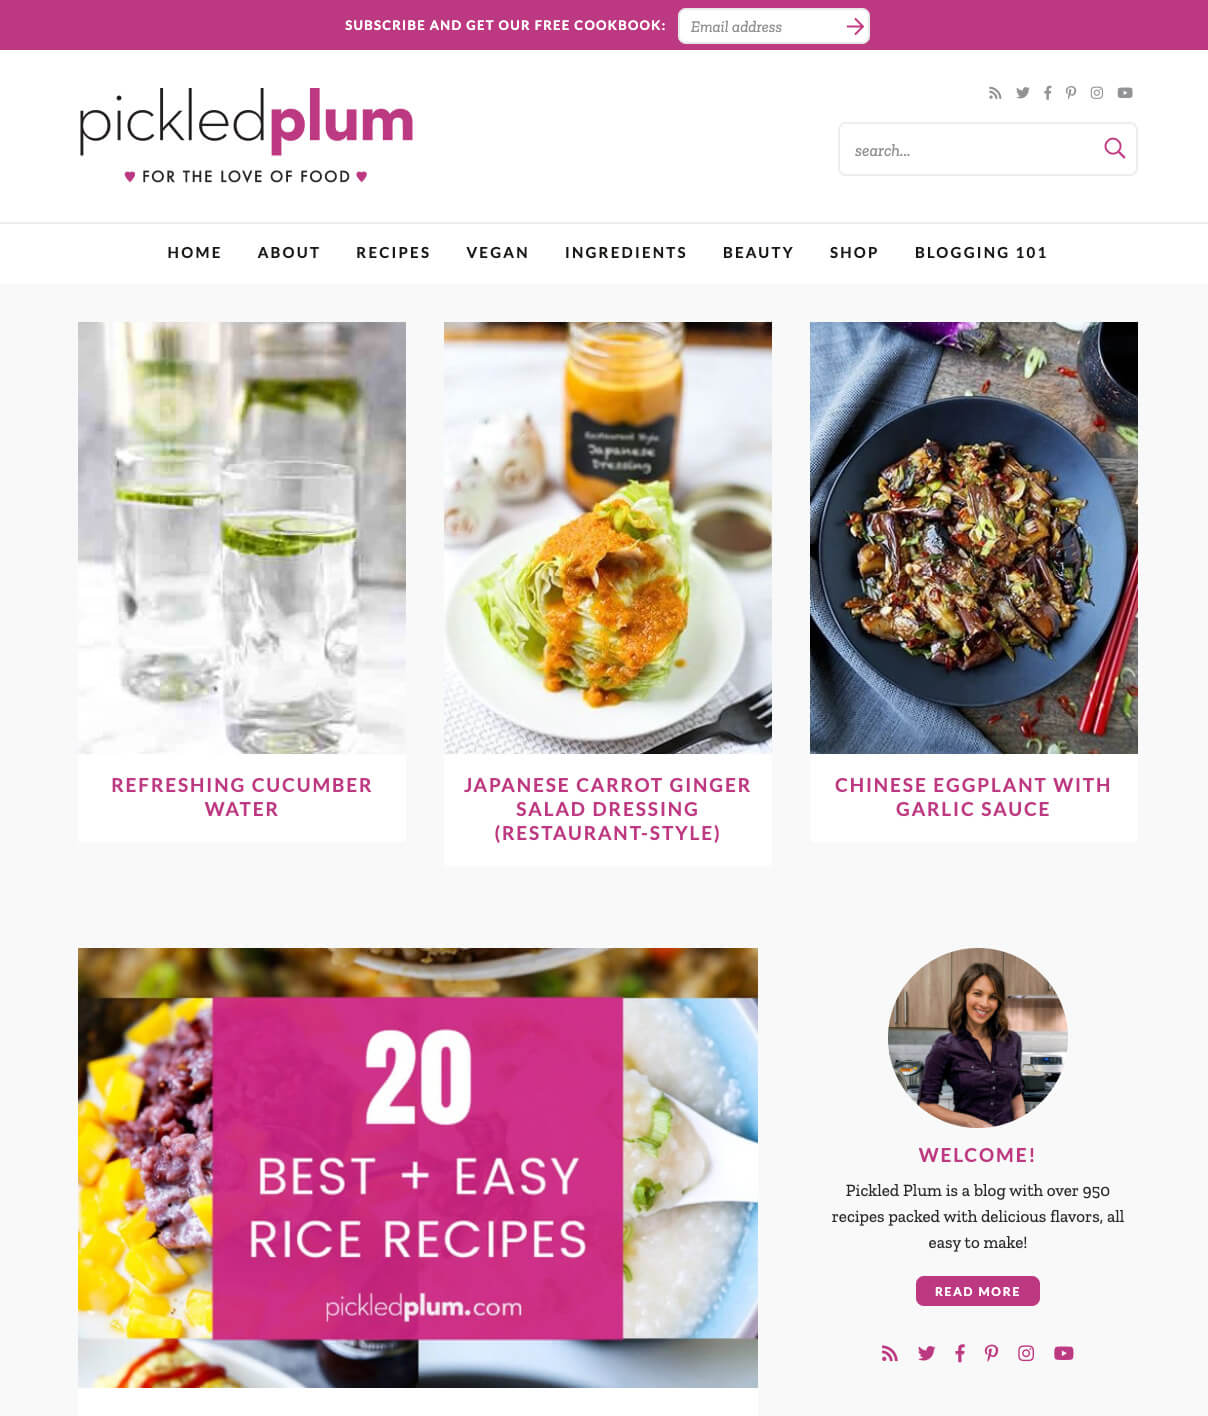
It didn’t take me long to get started because I knew right away that this was what I should be doing with my life. I always had a passion for cooking but didn’t want to work grueling restaurant hours.
The timing wasn’t perfect, I was working full-time and had just moved to a new city to be with someone I had dated long distance for 2 years. It was really stressful because there was so much I needed to adjust to – a new city, living with someone after being alone for a long time, a new apartment, no friends, and a job I hated.
But that didn’t stop me because I knew I had to make this work. I didn’t want to look back a year from that time and realize I hadn’t made any progress. If it didn’t work out at least I could say that I tried.
I posted my first recipe online 9 years ago and never looked back.
Since then my life has been a crazy ride of ups and downs, but also of wonderful triumphant moments. I have published over 950 recipes, some of which have been featured on Buzzfeed, Bon Appetit, Woman’s Day, Self, Prevention, Elle, Cosmopolitan, Today, Country Living, and many more online publications.
Pickled Plum receives on average 750,000 pageviews per month and is making six figures consistently, year after year. Take a look at my income reports where I share some insights on my monthly earnings.
Was there a bit of luck involved?
Absolutely not.
I worked HARD to get to where I am and it was worth every drop of sweat. Now I can work from anywhere around the world and never have to worry about getting fired!
And I firmly believe you can do the same.
You came to this page today because you have the same desire I had 9 years ago – to start something of your own. So let me show you how you can get the ball rolling in less than an hour!
Disclosure: I am a Bluehost affiliate which means that I will get a commission if you signup for the service through my link. This is at no additional cost to you, the reason why I’m disclosing this information is so I can be 100% transparent with you. Because of the good relationship I’ve had with Bluehost over the years,they are offering my readers (that’s you!) a 25% discount, which is only available through this link.
How to Find the Right Hosting Company
A hosting company is where your blog will live, reside.
Think of your blog as a baby for now. It’s small and doesn’t take up much space. It needs a lot of love and attention so it can grow to become a successful person.
The same goes for a blog – while it needs little space to grow in the beginning, it will require your full attention. And once it starts to grow it will cost more money to manage. Not only will you need more space to store all of your images, videos, and posts, you will also need more bandwidth.
But that’s nothing to concern yourself with right now – your blog has 1-2 years to go before it can learn to walk.
So what’s the best type of hosting for a brand new blog?
➡ Shared hosting.
Why shared hosting?
Because it’s significantly cheaper to share a server with other bloggers than to have to pay for your own. Trust me when I say you don’t need VPS or dedicated in the beginning, save your money!
You can upgrade later on once you start getting a lot of traffic. It’s easy if you stick with the same company since they will do it for you.
One company that offers shared hosting is Bluehost.
Bluehost is a well-established hosting service and one I personally have had a great experience with. It’s a one stop shop that offers all the services you need to get started:
- You get a free domain name when you signup for hosting.
- 1-Click WordPress Installation. This means you don’t have to sit through tutorials on how to install WordPress because it’s all done for you.
- You also get a free SSL certificate which protects your blog from attacks, reduces the risks of hacking, and creates a safer shopping experience, if you plan to sell products.
Click here to get a 25% discount, which is only available through this link (this low price is only available for readers of my blog and includes WordPress installation and a free domain name)
What about Free Hosting Platforms like Wix or Squarespace?
Those are fine for those looking to blog just for fun.
If your goal is to make money, then stay away from free platforms!
The main reason why it’s a terrible idea to blog using a free hosting platform is that you have no control over the type of ads that appear on your blog. Oh, and just so you know, you won’t be making any money from them either, it’s all going in the company’s pockets.
The other scary thing is that if they shut down, your blog disappears forever since it existed on their platform. You basically have no control over many features because you are not really renting the space.
Lastly, if you go absolutely free it means your domain name will come with a subdomain name. So instead of looking like this -> pickledplum.com , your domain name will look like this -> www.pickledplum.blogspot.com, which doesn’t look professional.
Listen, if your goal is to make money, you will have to look like a real business.
Even if you are just blogging and sharing information in the hopes of making a living from it, people are going to trust a blog that has a proper url over one that doesn’t. That’s just the way the cookie crumbles.
How To Start A Blog
Alright, so let’s get started!
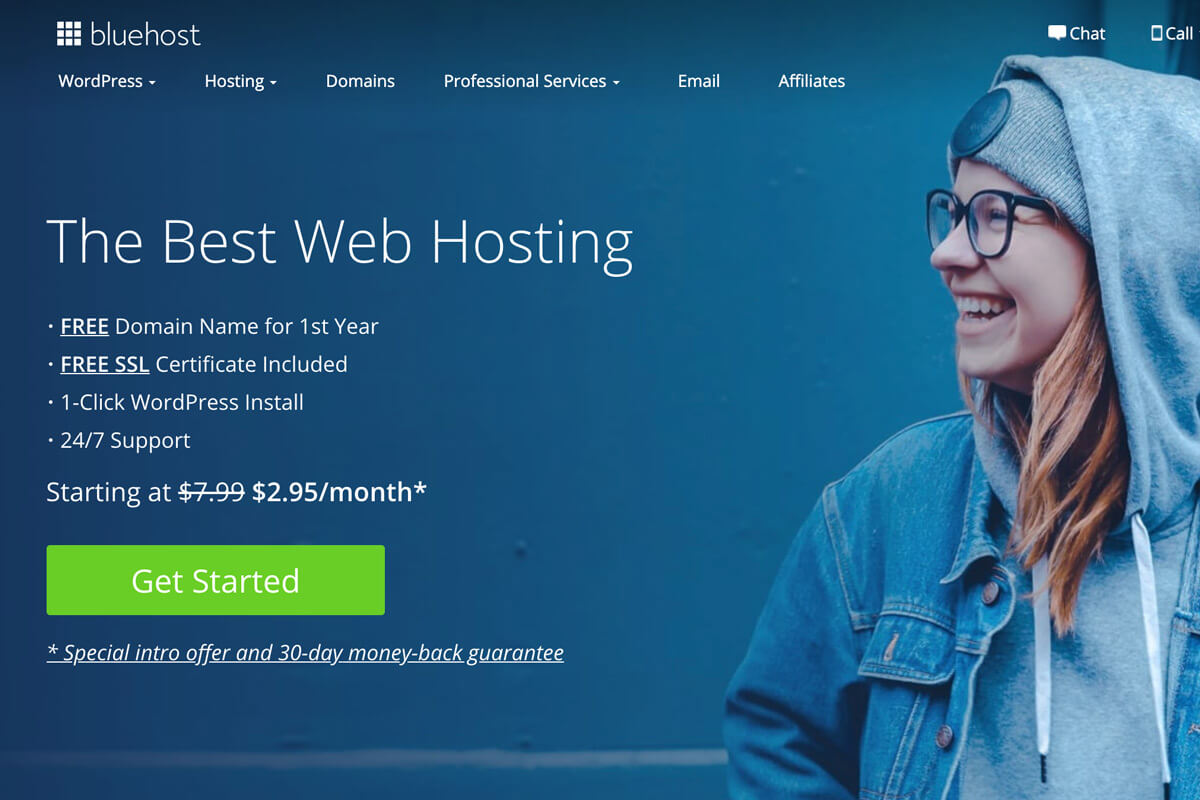
The first thing you need to do is to go to bluehost.com (Click here to get a 25% discount, which is only available through this link) and click on the Get Started button. This will take you to a page offering you various plans to choose from.
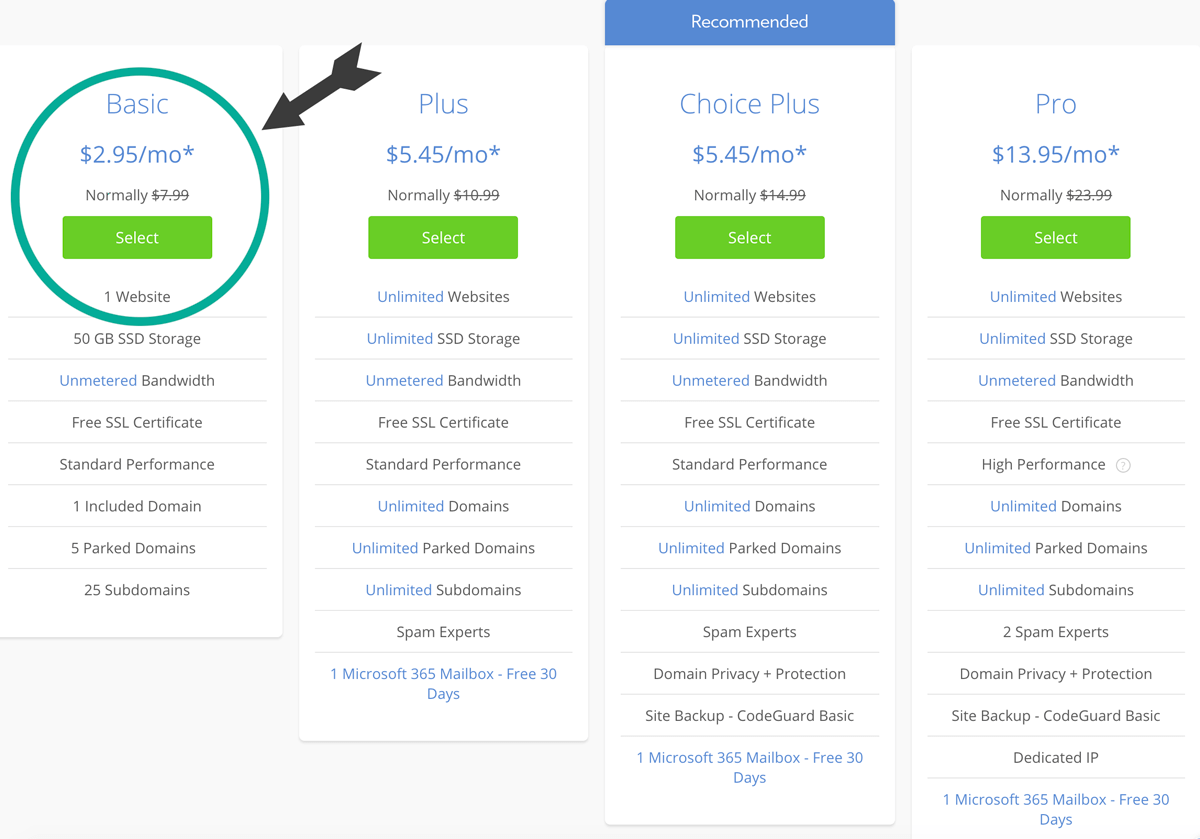
Since you are getting started and don’t need a lot of bandwidth, the basic plan will do just fine. 50 GB SSD storage is plenty and you should be fine with this plan for 1-3 years.
The next step is to choose a domain name which is the web address (url) of your blog.
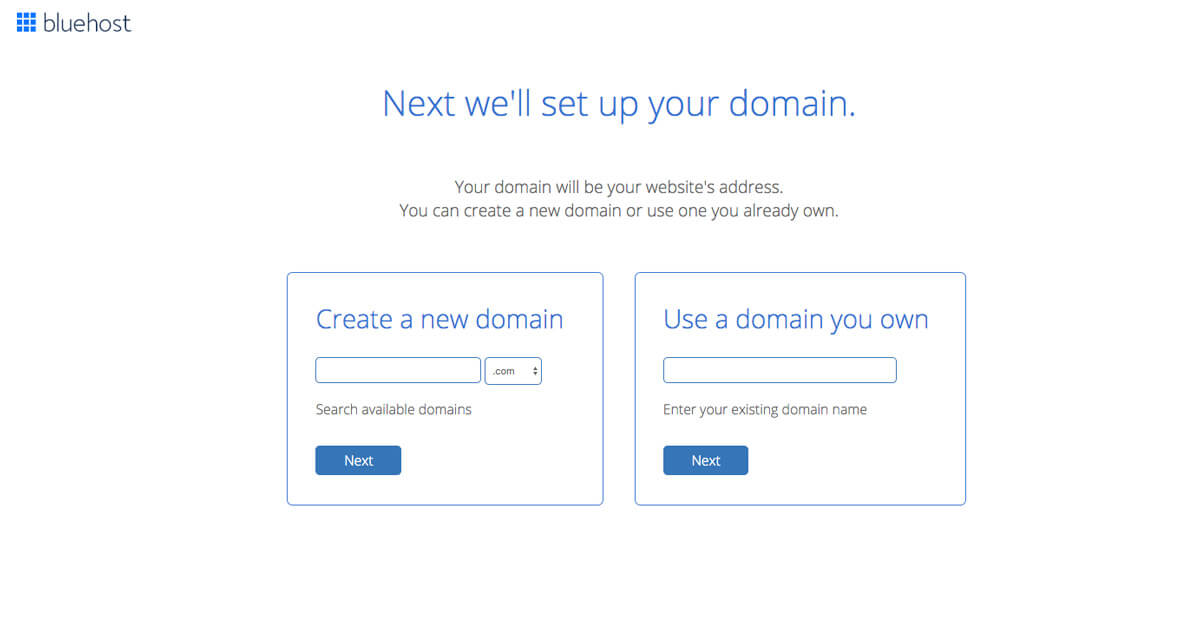
I suggest picking something easy to remember, something related to the category you will be writing about, or just using your name.
Don’t spend too much time thinking about a domain name. While it’s true that having a good domain name used to be important, it’s no longer the case. What matters is the content that you write.
If You Already Have a Domain Name
You will need to go to the website where you purchased the domain name (such as GoDaddy) and change the DNS address under DNS management.
Under name servers, you will have to change the ones that are already in there, for these ones: ns1.bluehost.com; ns2.bluehost.com. Make sure to add these without the period and semi colon.
Then once you are done signing up with Bluehost and are logged in, click on Domains, click on Assign, and follow the steps to add your domain name as an addon domain.
Next, add your personal information in the required fields and pick a plan. The 3-year plan has the best monthly rate while the 12-month plan is cheaper to pay up front.
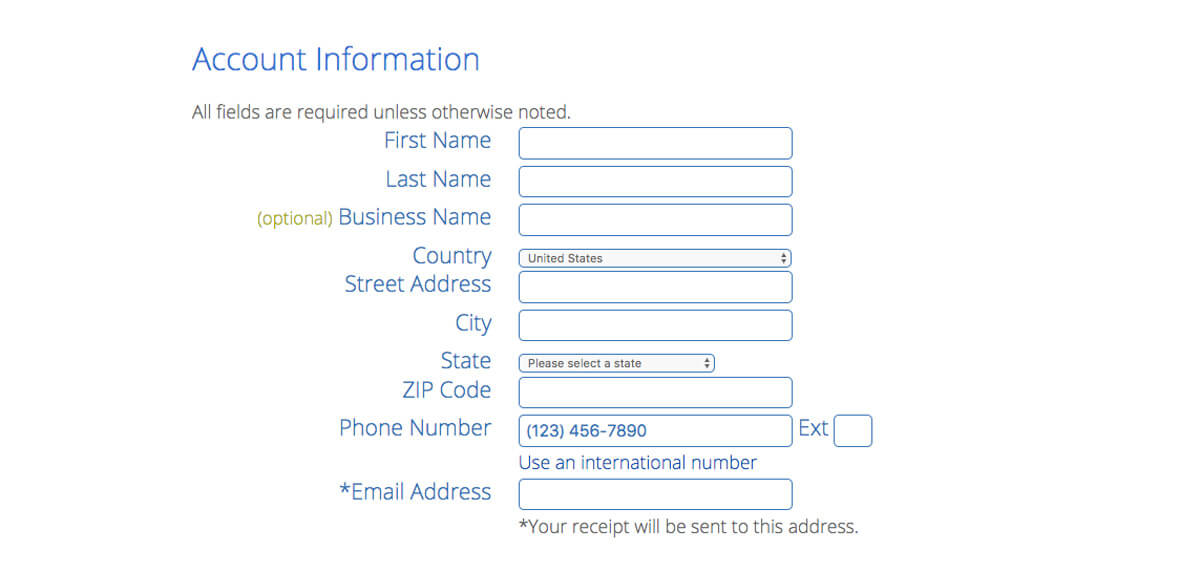
If you feel that 3 years is too long a commitment, keep in mind that you can cancel anytime and Bluehost will pay you back the amount of months you have left in your contract. So you can rest assured that you won’t be losing any money.
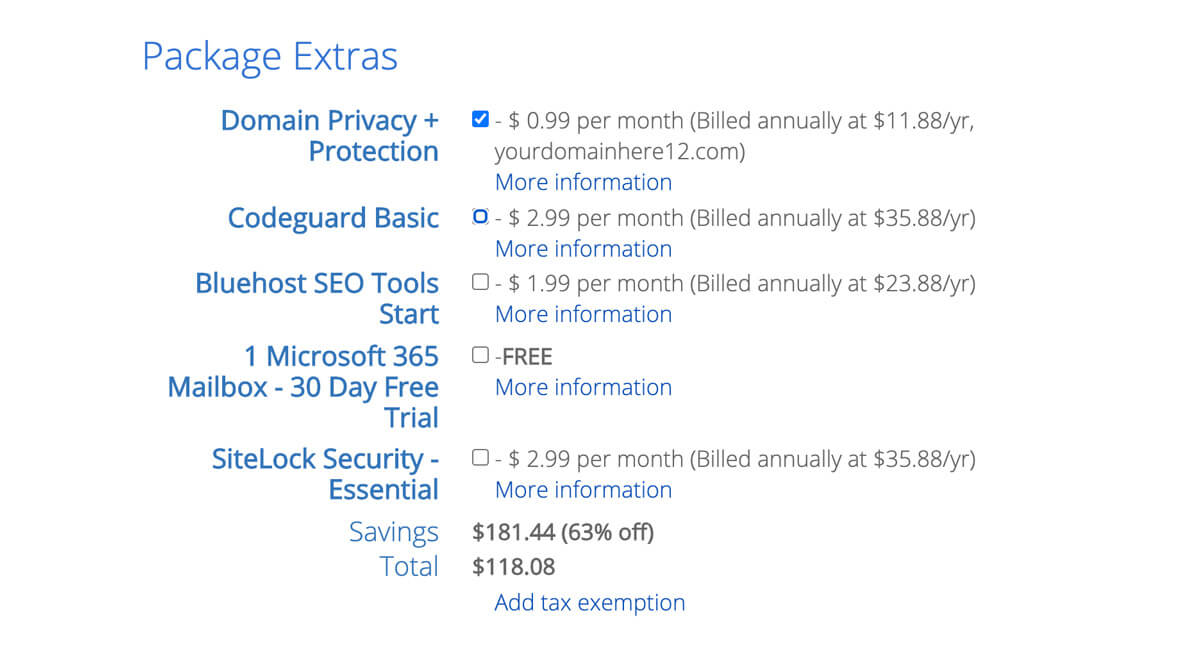
Adding an extra is optional but I highly recommend getting the Domain Privacy + Protection. This ensures that information such as your phone number and email address stays private. Domain and privacy protection means no one will be able to spam or scam you. To me, this option is indispensable.
Add your payment information, click the submit button, and… You are done! You are now the proud owner of a blog. Welcome to the blogging world, you are going to love it!
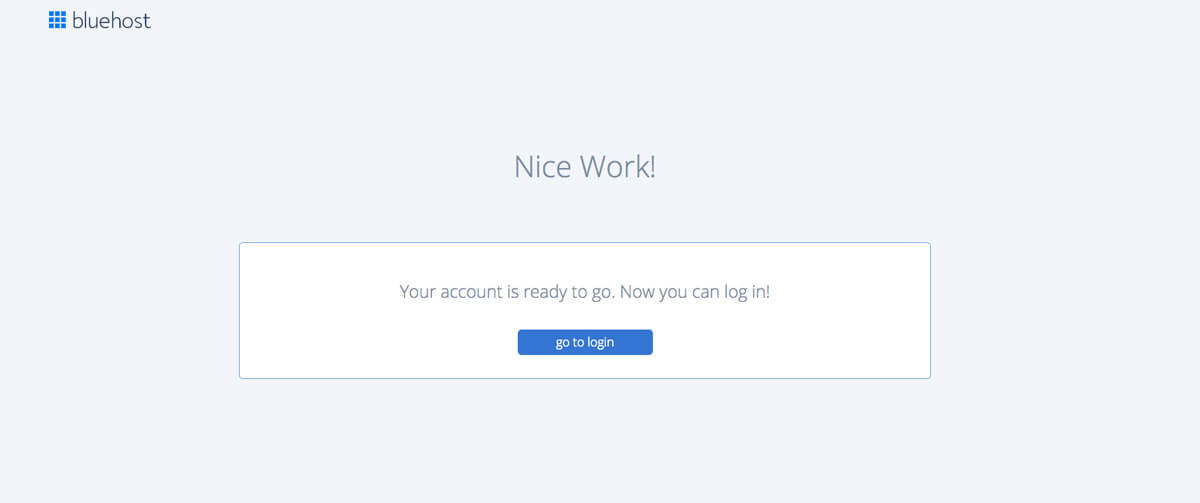
Quickly create a strong password – make sure to save this information somewhere safe!
Getting Started with WordPress (This is Where the Fun Begins!)
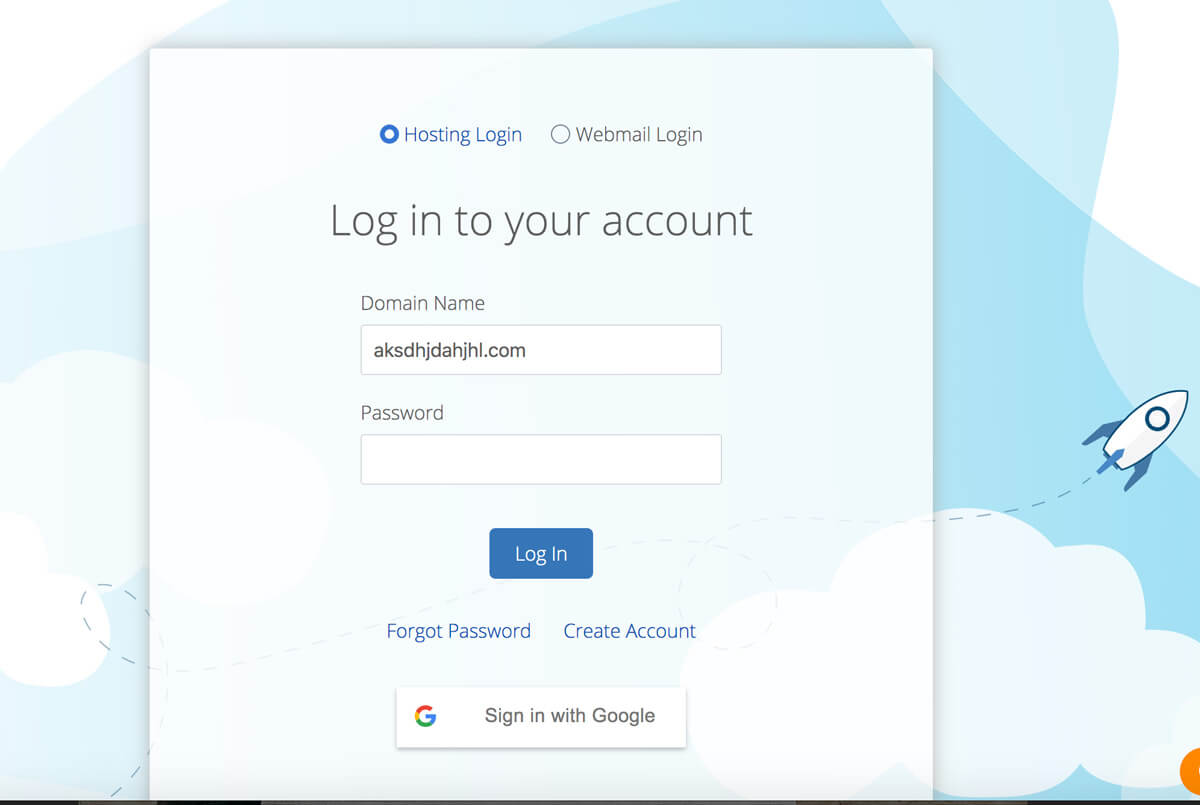
You are almost ready to create your first post, but first, you must choose a theme. A theme is the design of your blog, including the layout.
All the themes you see are free and you can preview them before settling on one. You can also change your theme any time you like, even after your blog has gone live.
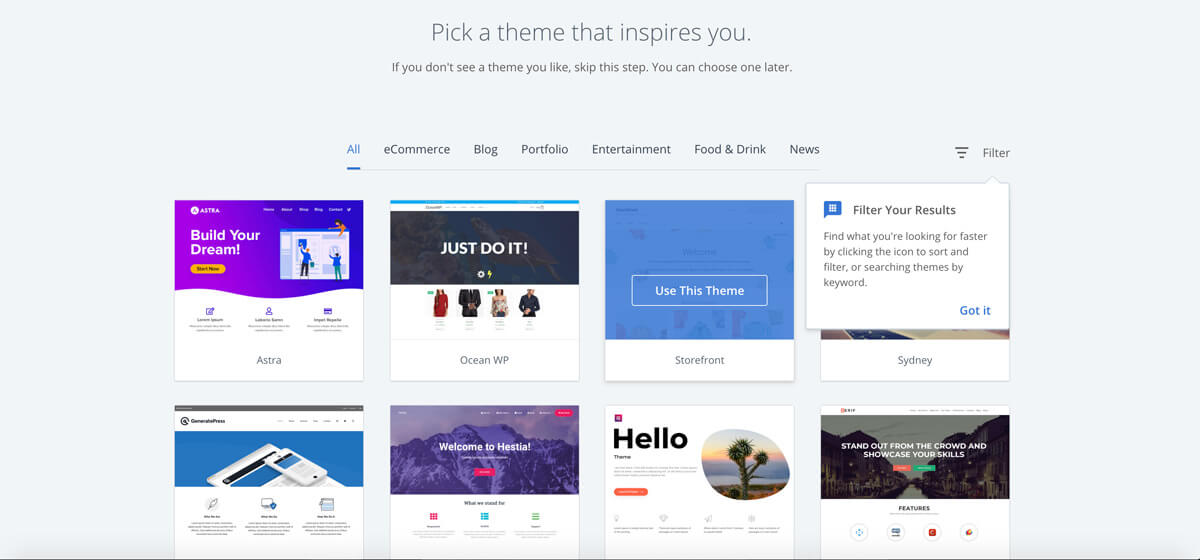
The free themes are good to use when you get started but you will eventually want to get something more responsive and with more functions to add bells and whistles to your blog. But that’s a different subject, one I will be writing about in the near future.
Once you find one that you like, click on ‘Use This Theme’ to activate it.
You are now ready to launch your blog, how exciting is that!
Before writing your first post I suggest creating an About Me page so you can tell people who you are and why you are blogging. Now notice how I said page and not post – that’s because an About Me article is static and doesn’t change much over time. A contact form would also be considered static content and therefore, created as a page.
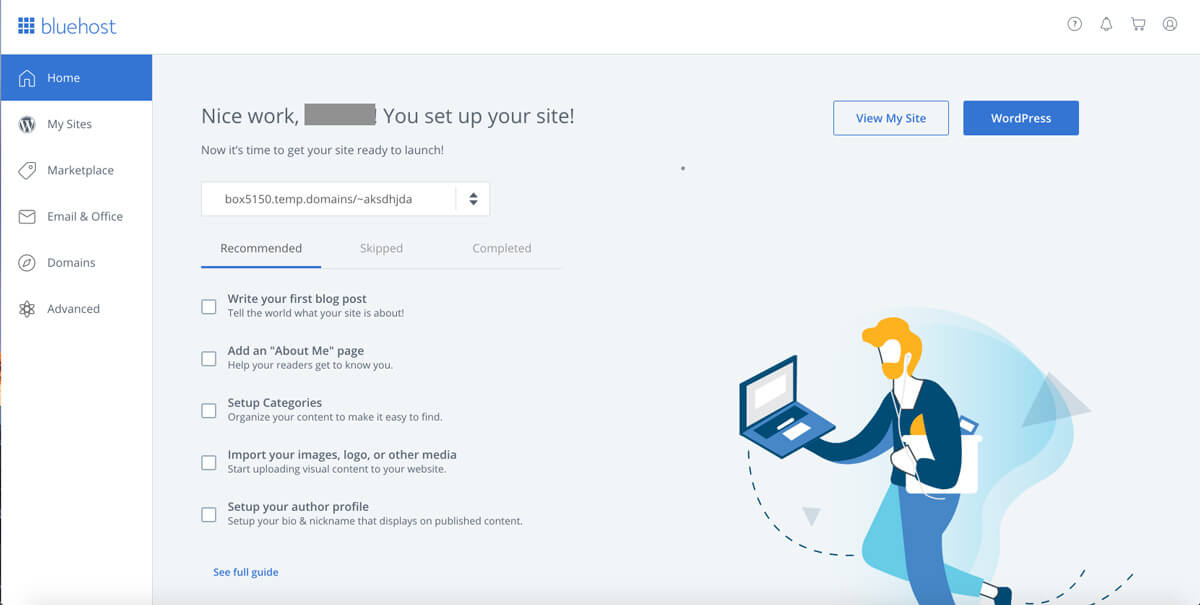
Check the box that says ‘add an “About Me” page’ to see the full how-to guide.
If you prefer to do this later, click on ‘View My Site’ to go directly to the WordPress dashboard.
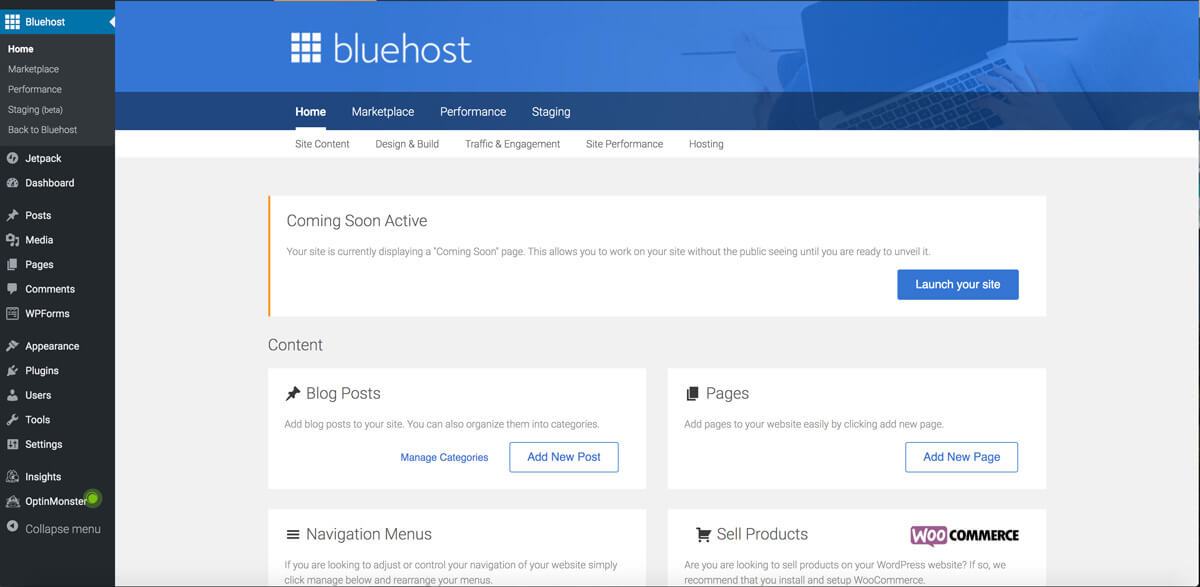
This is the WordPress dashboard, where you will be spending all of your time creating awesome content!
I know it looks a little intimidating at first, but trust me when I say you will get the hang of it in no time.
Let me talk about some of the features you see on the left sidebar. I’ll only mention the ones you will be using regularly.
WordPress Dashboard
Posts: Where you will be creating your posts and scheduling them to publish.
Media: Media is where your library of images will be. From there you can access all the images you upload on the blog and make changes, if necessary.
Pages: Where you will be creating your About Me, contact form, privacy policy, etc.. The main difference between a post and a page is that a post usually doesn’t appear in a menu. A page on the other hand can be used in a menu because the content is more permanent and less likely to change.
Appearance: This is where you go to control the appearance of your blog. The theme section lets you change things like the color and font of your blog. The Widget section lets you add or delete things like a signup box, ads, social icons, the extra bells and whistles that gives your blog character (like jewelry to an outfit).
You can also rearrange your posts to appear in a different order, if your theme allows it.
Plugins: Plugins are software components that add specific features to your blog. For example, if you wanted to add social icons to your blog, you would look for a plugin that offered that feature, and install it. You would then use the widget section to place it in the location you want. Plugins are also used to speed up a website, strengthen security, create a shopping section, and so much more!
Settings: Finally, the settings menu is used to configure the basic functions of your blog. You can control the amount of comments that are shown at a time, post format, thumbnail size, link structure, and also where you add your site title and the tagline.
Take your time to familiarize yourself with the dashboard, it’s filled with amazing features that are fun and extremely useful.
Once you are comfortable with WordPress, you can then focus on writing content that sells. I’ll show you how to do that and how to get visitors to your blog in the next post!

Leave a Reply